THIS IS ONLY SFX
Fake eye injury…. SFX!
Follow me on IG: @dr.d.ornithataylor_dpc
Follow me on FB: @Danielle Ornitha
Follow me on YouTube: @Danielle Ornitha
#sfx #sfxwound #immotyouraveragemakeupartist #sfxmakeup #centalfloridamakeupartist
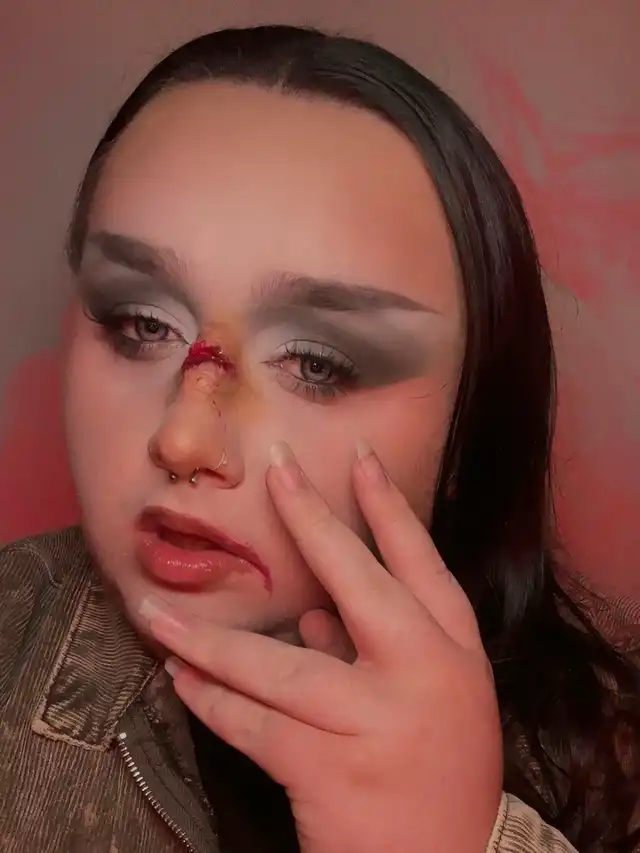
Hey everyone! So, you saw my fake eye injury post, and I wanted to dive a little deeper into the amazing world of SFX makeup, especially for those of you curious about "prosthetics makeup" and how to create those incredibly realistic "fake hand injury" looks. Creating convincing wounds isn't just for movies; it's a super fun skill for Halloween, cosplay, or just for playing around! Remember, as the image says, 'THIS IS NOT REAL; THIS IS ONLY SFX' – and that's the magic of it! Let's talk about the basics. If you're new to SFX, you don't need a huge kit to start. Some essentials I always recommend are: Liquid Latex: This is fantastic for creating textured skin, peeling effects, or building up layers for wounds. Just be careful if you have a latex allergy! Always do a patch test first. Scar Wax/Modeling Wax: This stuff is like clay for your skin. You can mold it into cuts, bullet holes, or raised scars. It's awesome for adding dimension. Fake Blood: A must-have! There are different types – dark venous blood, bright arterial blood, and even scab blood for older wounds. Experiment to see what effects you like best. Makeup Sponges & Brushes: Stippling sponges are great for bruising effects, and fine brushes help with detail. Grease Paints/Alcohol-Activated Paints: These help add color, depth, and realism to your wounds. Think purples, reds, blues, and yellows for bruising. Now, let's try a common request: a fake hand injury, like a deep cut. I always start by making sure the skin is clean and dry. Then, if I'm using scar wax, I'll take a small piece, warm it up in my hands, and roll it into a thin sausage shape. I'll press it onto the skin where I want the cut, blending the edges really well with a little vaseline or a blending tool so it looks like it's part of your skin. Then, carefully, using a non-sharp tool like a spatula or the back of a brush, I'll create a slit down the middle of the wax, opening it up to look like a gash. Next comes the fun part: coloring! Inside the 'cut,' I'll dab some dark red or even black paint to give it depth. Around the edges, I'll use a mix of reds, purples, and blues with a stippling sponge to create a bruised, irritated look. This layering of colors is key to making it look authentic. Finally, the blood! I like to drip some fresh blood into the cut and then use a stippling motion with a sponge around the wound for a splattered effect. For an older wound, a darker, thicker 'scab' blood works wonders. Remember, practice makes perfect! Don't be afraid to experiment with different techniques and materials. The goal is to create an illusion – something that makes people do a double-take. Safety is also super important; always use skin-safe products and remove them gently. I hope this inspires you to explore more SFX makeup. It's incredible what you can achieve with a bit of creativity and the right tools!